As there is a lot of request like ‘I have a generic email address such as info@domain.com and want to allow different users to receive emails sent to this email. How can I do this?’ on the Office 365 forum, here is a step by step.
So, the first thing to keep in mind is an email address can’t be associate with multiple users accounts, so adding an alias to the user account will not help in this case.
The solution is to create a distribution list, assign the email address to use, add user accounts as member of this group and (optionally) grant these users the ‘Send on behalf’ right to allow users sending email in lieu of the group.
Create the distribution list
- Connect to Outlook Web Access (https://mail.office365.com)
- Then go to the ECP (Exchange Control Panel) thanks to the Options\Set all options menu, located at the top right of the window (just below your name)
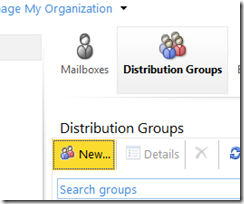
- Then change the options from Manage Myself to Manage my organization and click on Users & Group and then Distribution Groups
- You have reached a page where you can manage create public distribution group and manage the membership
NOTE: if you kept the option Manage Myself selected, the path is a little bit different: the path becomes Groups link available on the left part
- Next steps will use the first option (Manage my organization) but operations are similar with your own distribution list
- So, click on the New button available just below
- This opens a new window with some fields to fill (field in bold are mandatory)
- Display name: name of your distribution list
- Alias: alias of your distribution list; this can not contains space or special characters. This field will automatically fill the first part of the next one (email address)
- Email address: email address of your distribution list. If you have multiple domain, you can choose the one to use
- Description: provides details on the aim of this distribution list
- Make this group a security group: do not enable this option. If you enable this, you will be able to use the distribution list as a security group for granting access to SharePoint site for example
- Owners: owner(s) of this distribution list. By default, your account is the only one but you can add additional owners which will allow others to manage the distribution list
- Membership: add here all users which must be part of the distribution list
- Membership approval: allow you to define how new member requests are managed; anyone can join without approval, no one can join except if the owners add the user account or an approval is required
- Click on the Save button
- This is it, your distribution list is now created
Grant ‘send on behalf’ right
This step is optional and should be done ONLY if you want that the members send email on behalf of this group
Follow the steps provided here http://help.outlook.com/en-us/140/ff852815.aspx to grant ‘send on behalf’


